
In today’s digital photography era, editing is just as crucial as capturing the shot itself. Adobe Lightroom stands as one of the most influential and user-friendly tools for photographers and enthusiasts aiming to enhance their images professionally. Whether you’re a beginner learning the ropes or an intermediate user hoping to refine your skills, an essential Lightroom course can unlock your editing potential and streamline your workflow.
This article outlines the key topics covered in a high-quality Adobe Lightroom course and offers practical tips for improving your photo editing techniques.
Understanding Lightroom’s Interface and Workflow
One of the first things a good Lightroom course teaches is how to navigate the interface effectively. Lightroom is divided into modules such as Library, Develop, Map, Book, Slideshow, Print, and Web. However, most of your editing and organizing will take place in the Library and Develop modules.
Library Module: Organize Before You Edit
Before diving into editing, it’s essential to understand the value of organization. The Library module helps you:
- Import and catalog your images
- Apply keywords and metadata
- Rate and flag images for sorting
- Create collections and innovative collections
A course will walk you through setting up an efficient cataloging system so your workflow is smooth from the start.
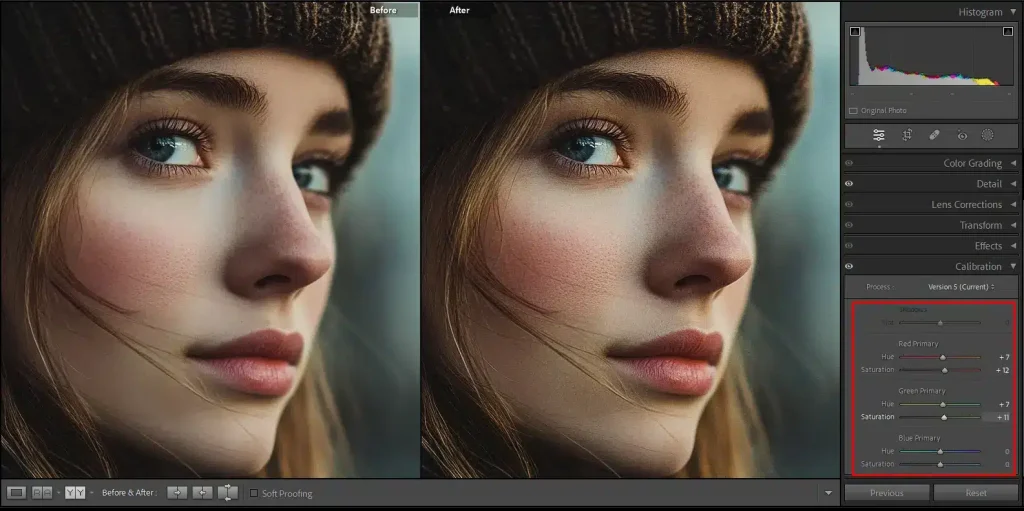
Develop Module: Core of Photo Editing
The Develop module is where the creative magic happens. A Lightroom course will take you through essential editing features like:
- Basic adjustments: exposure, contrast, highlights, shadows, whites, and blacks
- Tone curve: adding contrast and depth with precision
- HSL/Color Panel: adjust the hue, saturation, and luminance of individual colors
- Detail: sharpening and noise reduction techniques
- Lens Corrections and Transform: correcting distortion and perspective
With guided lessons, you’ll learn how to make non-destructive edits and maintain the highest quality for both web and print outputs.

Key Photo Editing Tips from the Course
A well-designed Lightroom course doesn’t just teach the software—it instills habits and tips that elevate your work. Here are some valuable takeaways:
Start with Presets, But Customize
Presets can be a time-saver, offering a great starting point for your edits. However, the course emphasizes customizing presets to suit each photo’s unique lighting and composition. You’ll learn how to create your own presets tailored to your style.
Master White Balance and Color Grading
White balance affects a photo’s mood and realism. A course will teach you how to adjust it for accuracy or creative effect. It will also dive into Color Grading, a powerful feature that allows you to control shadows, mid-tones, and highlights separately for cinematic results.
Use Masks and Local Adjustments
One of Lightroom’s most powerful tools is masking. You’ll learn how to use:
- Radial and Linear Gradients
- Brush masks for selective adjustments
- AI-powered Subject and Sky selections
These allow targeted changes that give your photos professional polish without affecting the whole image.
Streamlining Your Editing Workflow
An essential Lightroom course also covers workflow efficiency:
- Keyboard shortcuts to save time
- Sync settings across multiple photos
- Batch editing for an event or travel photography
- Exporting with optimal settings for web, social media, or print
By the end of the course, you’ll be equipped to edit faster, smarter, and more consistently.
Conclusion
A comprehensive Adobe Lightroom course is invaluable for anyone serious about photo editing. It not only helps you understand the software’s robust features but also improves your creative decision-making and workflow efficiency. With the proper guidance, you’ll turn good photos into stunning visuals and develop a signature editing style.
Whether you’re aiming for a professional career or want to enhance personal projects, mastering Lightroom is a smart step forward.